
Intro:
In this tutorial we will look at how to best put the Fiber Glider DIY Kit together. We will go over what pitfalls to look out for, what tools and glue you will need. Everything you need to know to get your Fiber Glider built right the first time.
Let’s get started:
Steps:
Step 1 Getting Started:
- Clean up edges of the wing fuselage and tail with sand paper.
- If necessary wipe down the carbon fiber components with a damp cloth.
Step 2 Carbon Fiber Prep:
- Score the top and bottom of the carbon fiber pieces where epoxy will be applied, as seen in Figure 1.
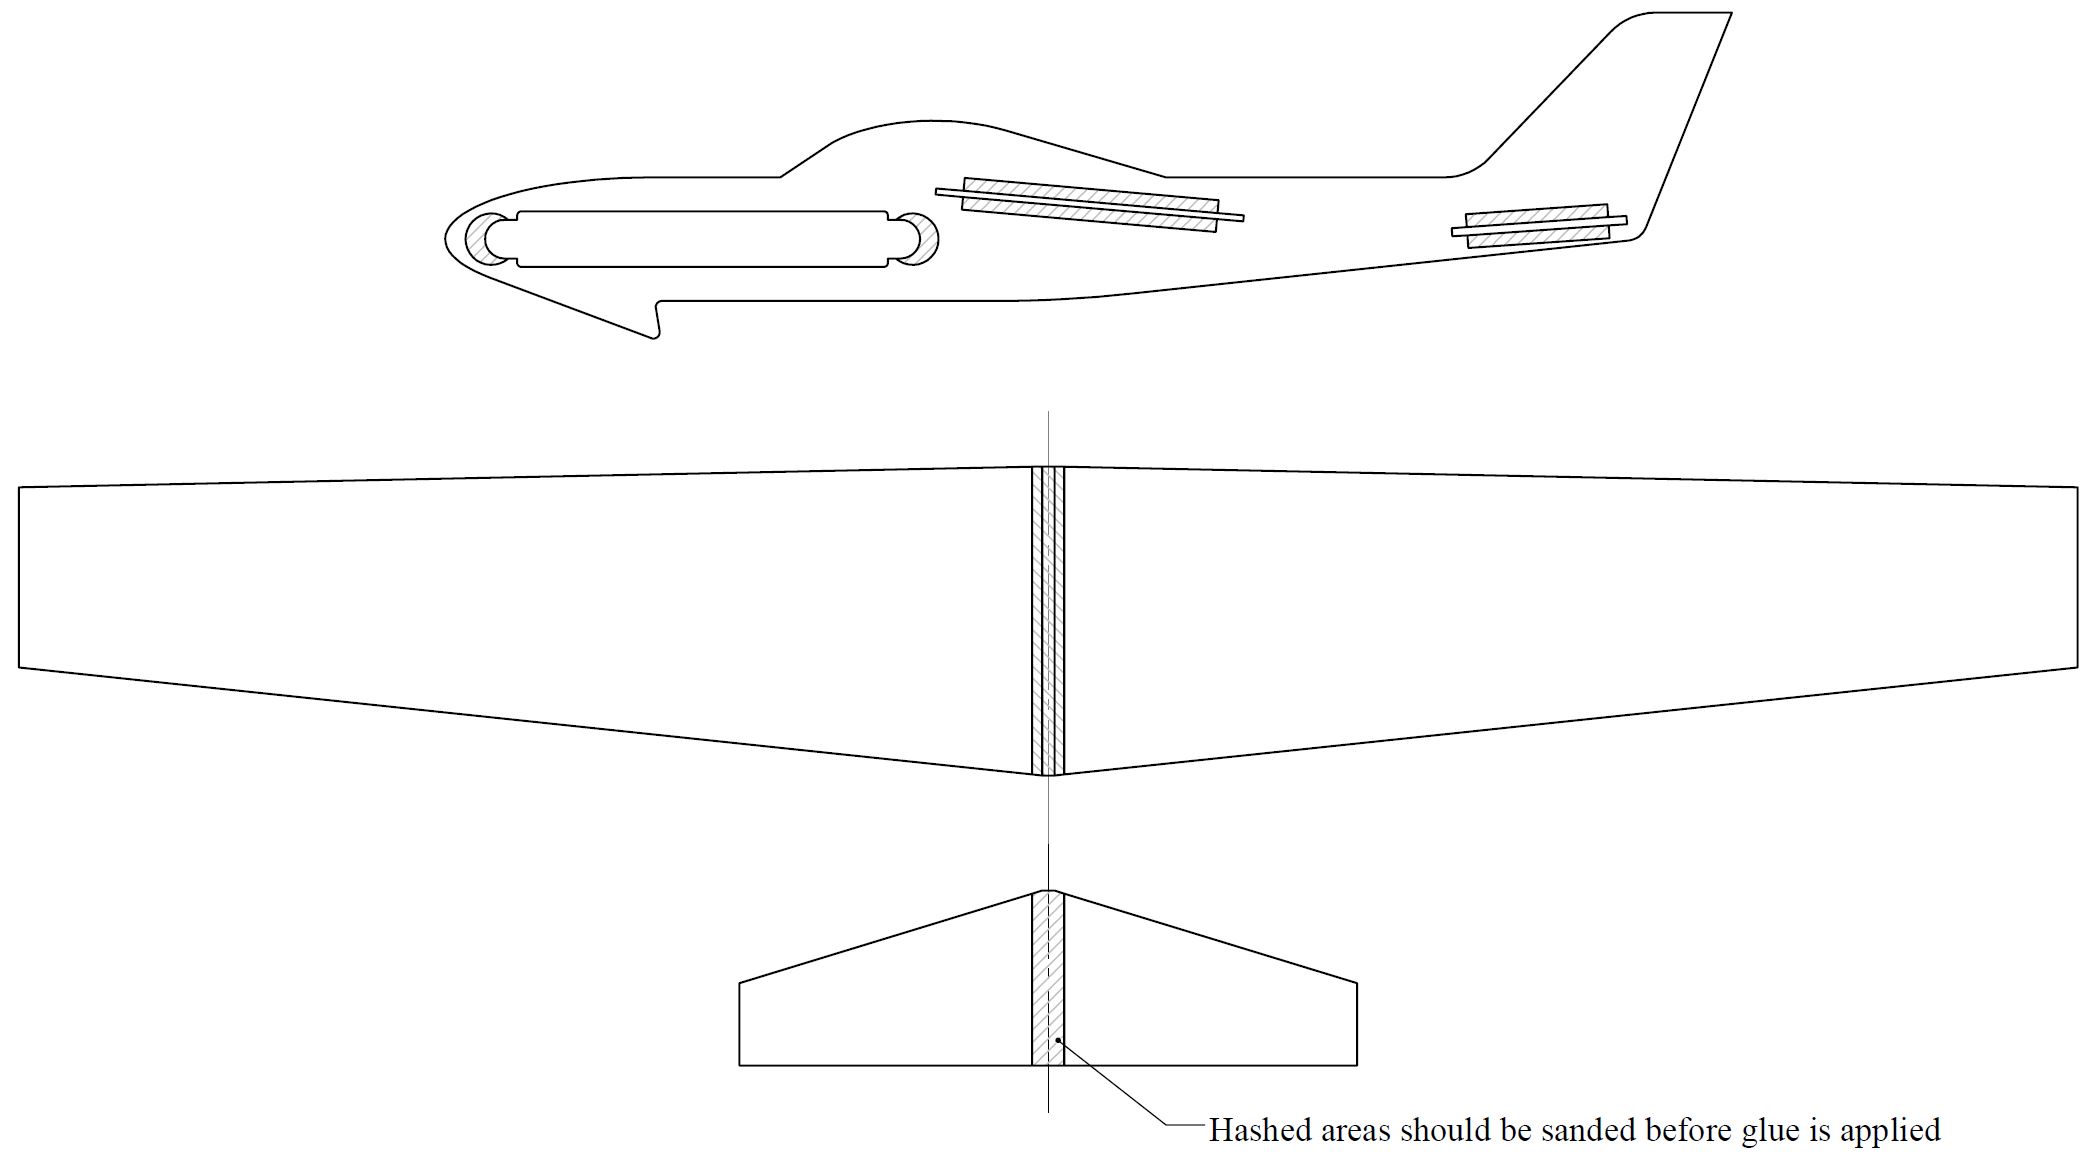
FIGURE 1: Roughen the Carbon Fiber in the hashed areas as seen below. You can download and print this PDF showing where to roughen the carbon fiber here.
Step 3 Ballast Assembly:
- Thread the ballast onto the threaded rod
- Loosely screw on the acorn nuts onto ether end of the threaded rod

FIGURE 2: How the ballast is assembled.
Step 4 Fuselage:
- Insert the Ballast Assembly into the cut out in the nose of the fuselage.
- Adjust the ballast so that it is in the center of the treaded rod, as seen in Figure 3.
- Being careful to keep the glue off of the threaded rod, glue the front and back acorn nuts to the fuselage.
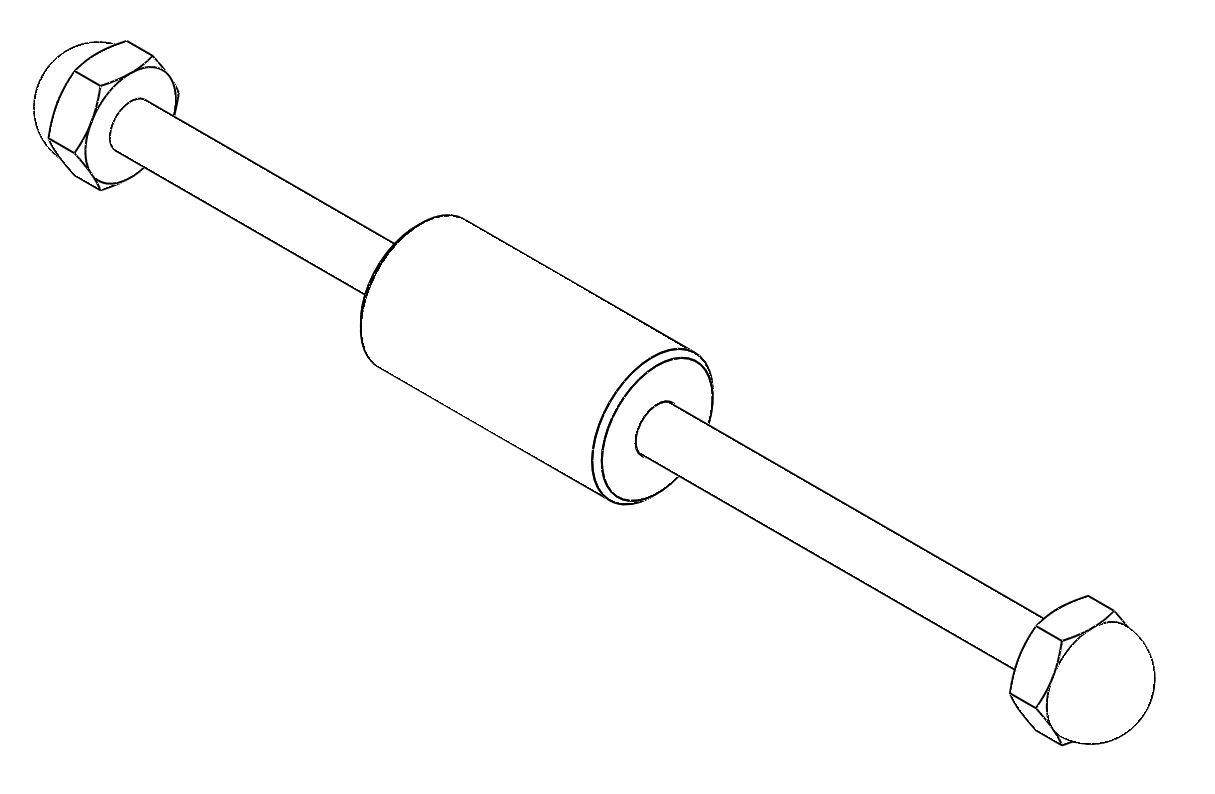
FIGURE 3: make sure that the ballast in in the center of the threaded rod when gluing the Ballast Assembly into the fuselage.
Step 5 Assembly:
- Insert the wing into the fuselage.
- Secure the wing such that it will not move easily
- Apply glue where the top side of the wing meets the fuselage.
- Once the glue is set, flip the airplane over and glue the bottom side of the wing to the fuselage.
- Repeat for the tail.
Step 6 Finish Up:
- Let the glue completely dry.
4 Comments